Overview
Data Collections in UpBrains AI provide a powerful, structured data storage layer that your AI agents can read from, write to, and query in real time. Think of a collection as a smart, searchable database table that lives natively within the UpBrains platform and is purpose-built for AI-driven workflows.
Under the hood, each collection is powered by an enterprise-grade distributed search and vector database engine, giving you high-performance indexing, filtering, querying, text-based and vector-based semantic search out of the box. The Collections’ AI-powered Query APIs and interface supports both traditional keyword-based retrieval and vector-based semantic search, enabling your agents to find relevant records using natural language rather than exact matches alone. Common use cases for Data Collections include product catalogs, customer and vendor directories, price lists, compliance records, parts inventories, and any structured dataset that your AI agents need to reference or maintain during automated workflows.
Prerequisites
• An active UpBrains AI workspace with Admin access.
• Familiarity with the data you want to store (field names, types, and relationships).
• (Optional) A CSV file if you want to seed the collection with initial data.
Step 1: Navigate to Collections
Log in to your UpBrains AI workspace and switch to the Admin workspace using the workspace selector at the top of the left sidebar. In the sidebar navigation, expand the Tools section and click on Collections.
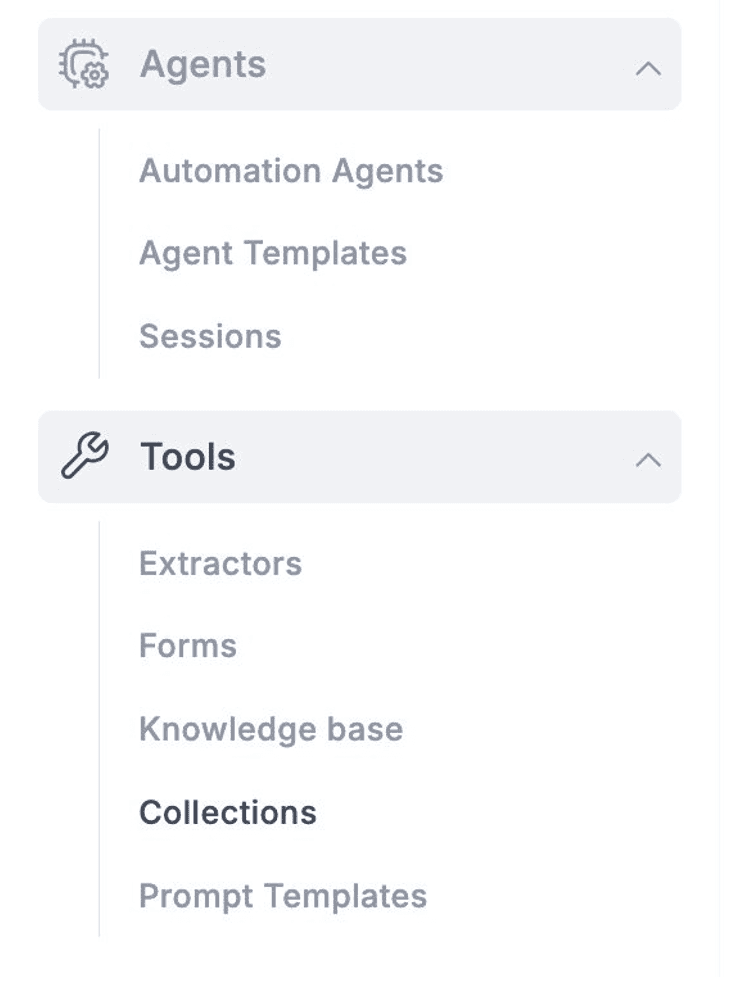
The Admin sidebar with Collections highlighted under the Tools section.
Step 2: Create a New Collection
On the Collections page, you will see a list of any existing collections in your workspace. To create a new collection, click the + New Collection button in the top-right corner of the page.
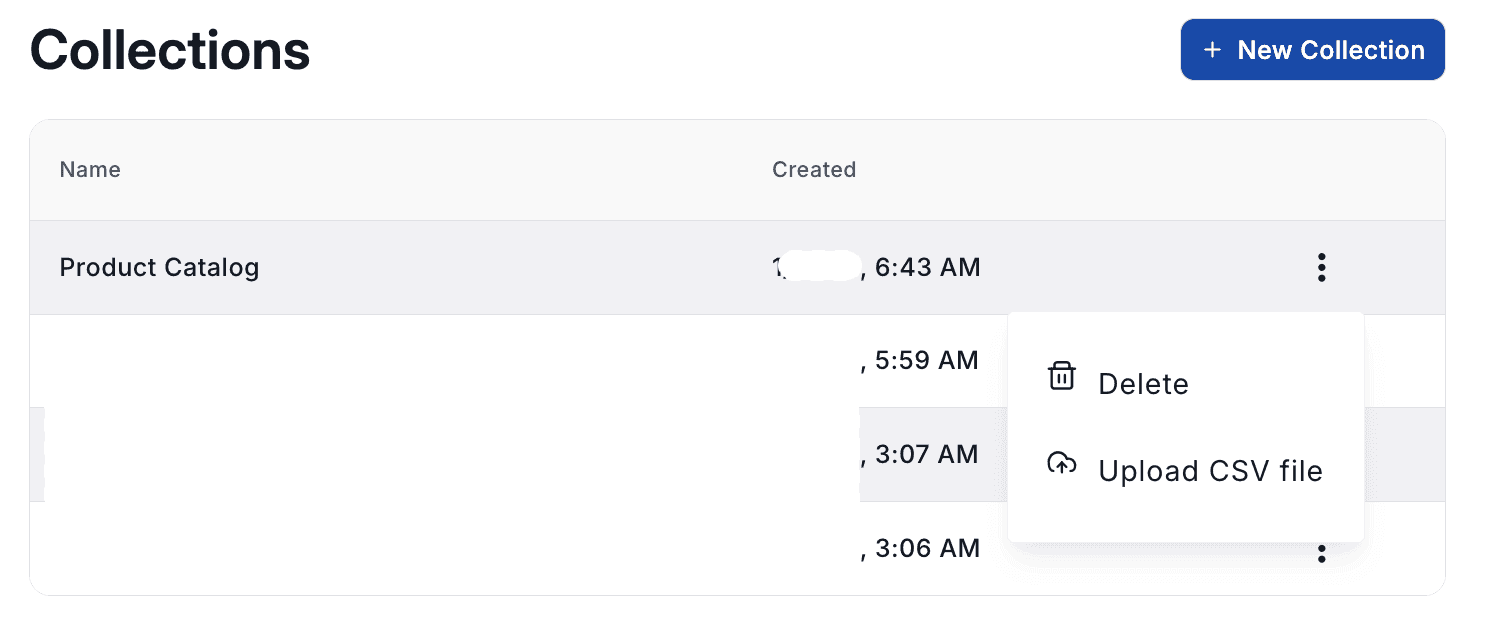
The Collections list page showing existing collections and the New Collection button.
You will be taken to the New Collection form. Start by entering a descriptive Collection Name (e.g., “Product Catalog”, “Vendor Directory”, “Parts Inventory”). Optionally, check the box to add this collection to all departments automatically.
Step 3: Define Your Fields
The core of your collection is its schema—the set of fields (columns) that define the structure of each record. In the Items section of the form, click + Item to add fields one by one. For each field, you will configure the following properties:
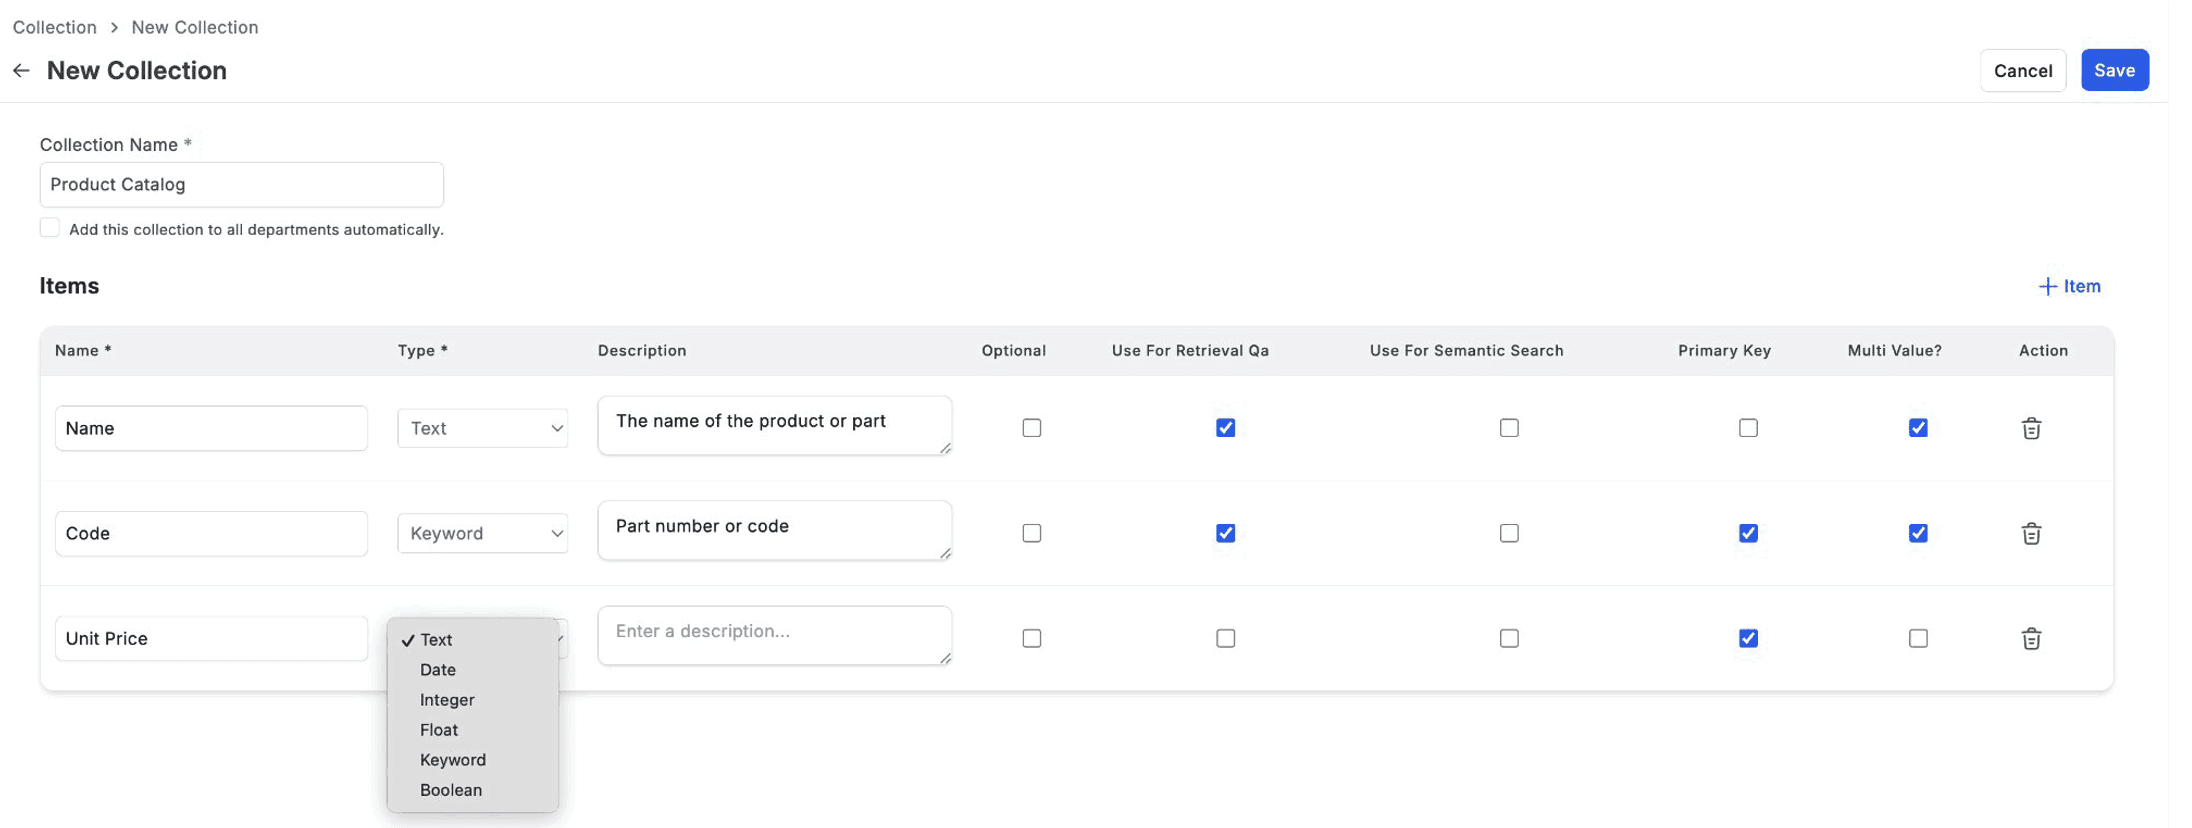
The New Collection form showing field configuration with Name, Type, Description, and property checkboxes.
Field Properties Reference
Property | Description |
|---|---|
Name | A unique name for the field/column in your collection. |
Type | The data type of the field (Text, Keyword, Integer, Float, Date, or Boolean). |
Description | An optional description explaining the purpose of the field. This helps AI agents understand the data context when querying. |
Optional | When checked, records can be saved without providing a value for this field. |
Use For Retrieval QA | Enables this field for keyword-based search and retrieval queries. Recommended for fields users will commonly search or filter on. |
Use For Semantic Search | Enables vector-based (semantic) search on this field, allowing AI-powered natural language queries that understand meaning rather than just keywords. |
Primary Key | Marks this field as part of the collection's composite primary key, used to uniquely identify records. Multiple fields can be combined to form a composite key. |
Multi Value? | Allows the field to hold multiple values per record (e.g., a product with multiple category tags or alternative codes). |
💡 Tip: Write clear, descriptive field descriptions. AI agents use these descriptions to understand the purpose of each field when generating queries, so a good description like “The name of the product or part” significantly improves query accuracy.
Step 4: Choose the Right Field Types
Selecting the correct field type ensures accurate storage, efficient search, and proper sorting. UpBrains AI supports the following field types:
Field Type | Description & Use Case | |
|---|---|---|
Text | Free-form text fields such as product names, descriptions, or notes. Supports full-text and semantic search. | |
Keyword | Exact-match identifiers such as part numbers, SKUs, status codes, or categories. Ideal for filtering and aggregation. | |
Integer | Whole number values such as quantities, counts, or ranking scores. | |
Float | Decimal number values such as unit prices, weights, or percentages. | |
Date | Date and datetime values for tracking timestamps, expiration dates, or schedule entries. | |
Boolean | True/false flags such as active status, availability, or approval indicators. | |
💡 Best Practice: Use Keyword for identifiers and codes that require exact matching (e.g., SKU-12345). Use Text for longer, natural-language fields where full-text or semantic search is beneficial (e.g., product descriptions).
Step 5: Save and Seed Your Collection
Once you have defined all of your fields, click the Save button in the top-right corner to create the collection. Your new collection will now appear in the Collections list.
Populate Collections via CSV Content
To populate your collection with initial data, click the three-dot menu (⋮) next to your collection in the list and select Upload CSV file. The CSV file should have column headers that match the field names you defined in the collection schema. UpBrains will automatically map the CSV columns to the corresponding fields and import the data.
💡 Note: Ensure your CSV headers match the field names in your collection exactly. Mismatched headers will result in unmapped data. The upload supports standard CSV format with comma-separated values and UTF-8 encoding.
Viewing and Managing Collection Data
Once your collection is created (and optionally seeded with CSV data), you can browse, search, and manage its records directly from the Operations Workspace.
Switch to the Operations Workspace
From the Workspace dropdown at the top of the left sidebar, select Operations. This is the day-to-day workspace where your team interacts with collections, conversations, cases, and other operational data.
Open Your Collection
In the left sidebar, click on Collections. You will see a dropdown listing all available collections in your workspace. Select the collection you want to work with (e.g., “Product Catalog”). The main panel will display the records stored in that collection in a tabular format.
Search, Filter, and Manage Records
From the collection view, you have full control over your data:
Search: Use the search bar at the top to find specific records by typing a query and pressing Enter.
Filter: Click the Filters button to apply field-based filters and narrow down the displayed records.
Create new items: Click the + Create Item button in the top-right corner to manually add a new record to the collection.
Edit an item: Click the three-dot menu (⋮) in the Action column next to any record and select Edit to modify its values.
Delete an item: Click the three-dot menu (⋮) and select Delete to remove a record from the collection.
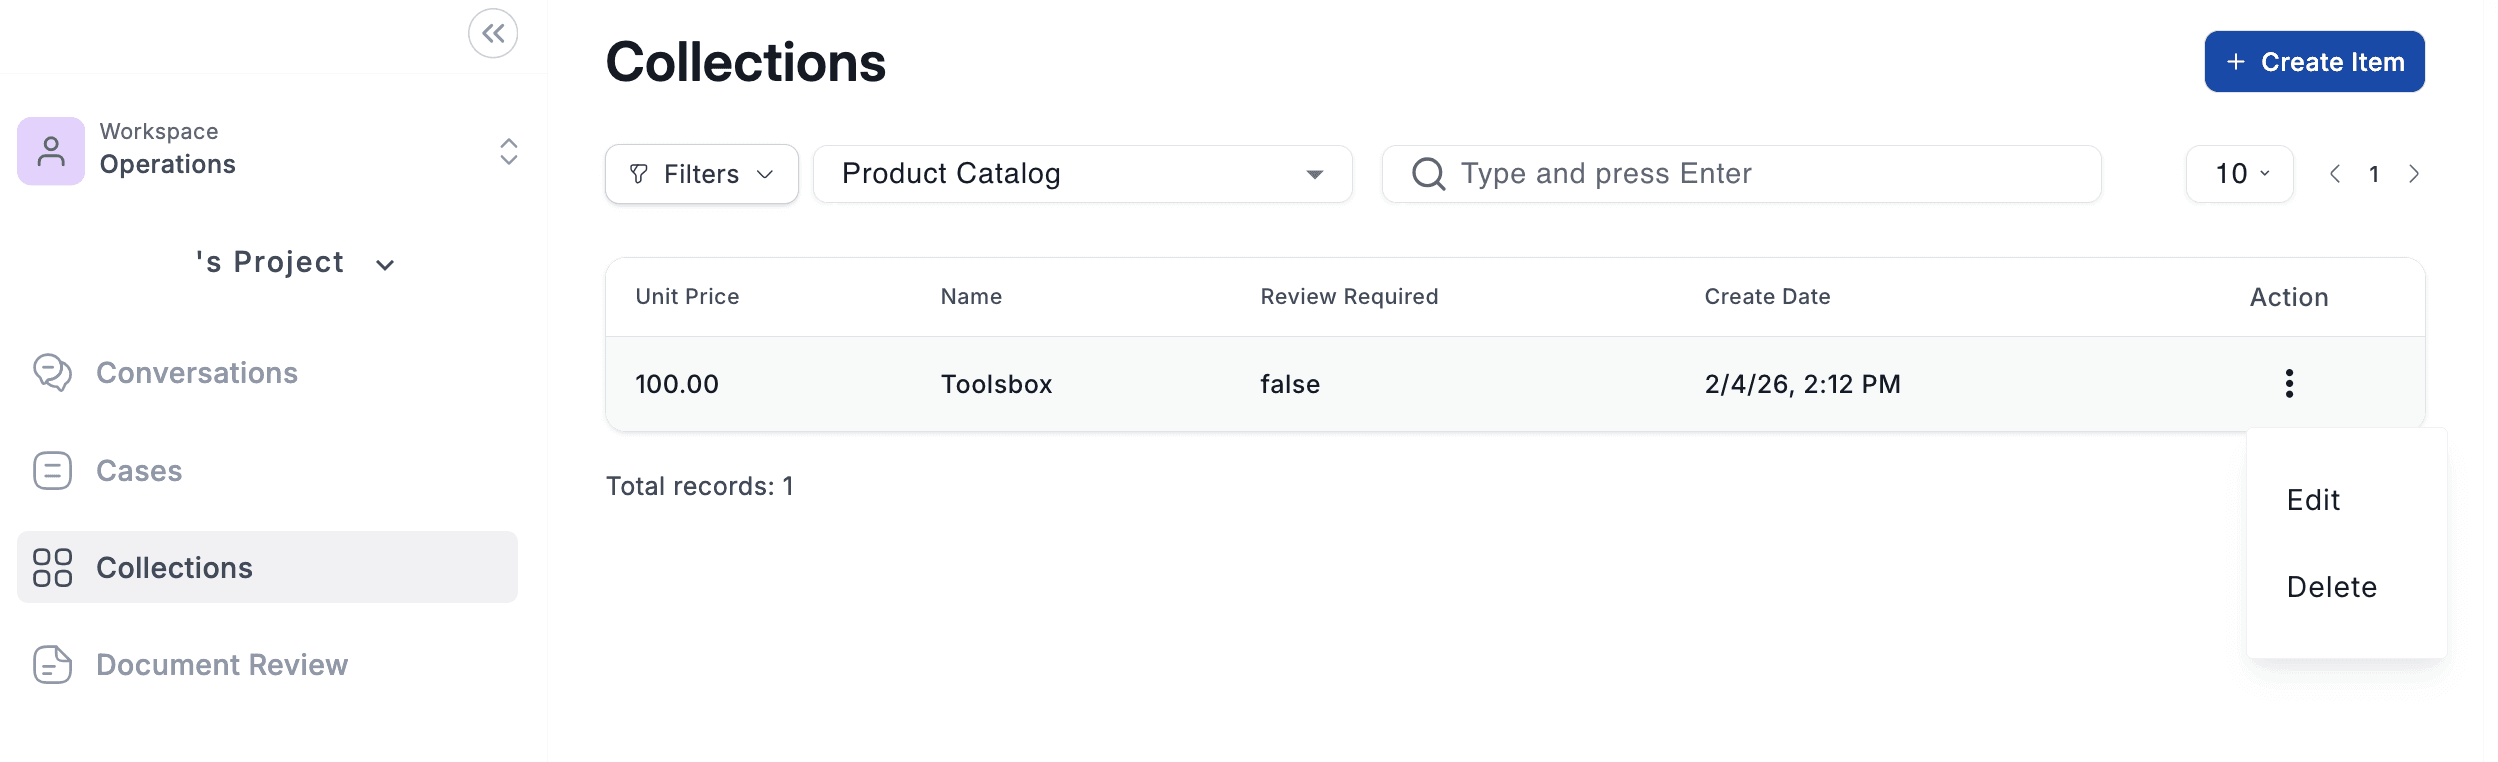
The Operations Workspace displaying a Product Catalog collection with search, filters, pagination, and per-record Edit/Delete actions.
💡 Tip: The Operations Workspace is designed for everyday users and operators. Collection schema configuration is done in the Admin Workspace, while day-to-day data browsing and management happens here in Operations.
Using Collections with AI Agents
Once created and populated, Data Collections become a powerful tool for your AI agents. Agents can interact with collections in several ways:
Query data: Agents can search and retrieve records using keyword-based queries, structured filters, or natural language semantic search powered by the AI Query layer.
Insert records: Agents can add new records to the collection as part of an automated workflow (e.g., creating a new product entry when processing an incoming catalog).
Update and delete records: Agents can modify existing records or remove outdated entries to keep the collection current.
Sync with external systems: Collections can be periodically synchronized with external data sources including databases, ERPs (e.g., SAP, NetSuite), accounting systems (e.g., QuickBooks, Sage), and other enterprise platforms to keep data up to date.
Setting Up Data Synchronization
UpBrains AI supports automated data synchronization between your collections and external data sources. This enables your collections to stay up to date with the latest information from your systems of record.
Supported Sync Sources
Databases: SQL and NoSQL databases accessible via standard connection protocols.
ERP systems: SAP, Oracle, NetSuite, Microsoft Dynamics, and other enterprise resource planning platforms.
Accounting systems: QuickBooks, Sage, Xero, and similar financial platforms.
Online spreadsheets: Google Sheets and Microsoft Excel 365, enabling teams to maintain data in familiar spreadsheet tools while keeping the collection in sync.
Other external systems: — CRMs, inventory management tools, logistics platforms, and any system accessible via API.
How to Configure a Sync
To set up automated data synchronization for a collection, you need to create a dedicated Automation Agent with a schedule trigger. This agent will run on a recurring basis (e.g., every hour, daily, or weekly) and pull the latest data from your external source into the collection, or push updated records from the collection out to external systems.
To create a sync agent, navigate to Agents > Automation Agents in the left sidebar and follow the standard agent creation workflow. Select a schedule-based trigger and configure the data source connection and field mapping.
➡ For detailed instructions on creating AI Agents, see: Creating your First AI Agent
➡ For connecting to external tools and data sources, see: Connecting External Tools & Data
💡 Tip: For spreadsheet-based syncs with Google Sheets or Microsoft Excel 365, use the built-in Google Sheets or Microsoft 365 connectors available under Connections in Admin Settings. This provides a seamless, no-code sync setup.
Summary
Data Collections give your UpBrains AI workspace a flexible, AI-ready data layer powered by OpenSearch. With support for structured schemas, multiple field types, semantic search, CSV imports, and automated syncing with external systems, collections serve as the central data backbone for your AI-driven automation workflows. Once configured, your agents can query, insert, update, and manage collection data autonomously, keeping your operations running smoothly with minimal manual intervention.
Related Documentation
Overview
Data Collections in UpBrains AI provide a powerful, structured data storage layer that your AI agents can read from, write to, and query in real time. Think of a collection as a smart, searchable database table that lives natively within the UpBrains platform and is purpose-built for AI-driven workflows.
Under the hood, each collection is powered by an enterprise-grade distributed search and vector database engine, giving you high-performance indexing, filtering, querying, text-based and vector-based semantic search out of the box. The Collections’ AI-powered Query APIs and interface supports both traditional keyword-based retrieval and vector-based semantic search, enabling your agents to find relevant records using natural language rather than exact matches alone. Common use cases for Data Collections include product catalogs, customer and vendor directories, price lists, compliance records, parts inventories, and any structured dataset that your AI agents need to reference or maintain during automated workflows.
Prerequisites
• An active UpBrains AI workspace with Admin access.
• Familiarity with the data you want to store (field names, types, and relationships).
• (Optional) A CSV file if you want to seed the collection with initial data.
Step 1: Navigate to Collections
Log in to your UpBrains AI workspace and switch to the Admin workspace using the workspace selector at the top of the left sidebar. In the sidebar navigation, expand the Tools section and click on Collections.
The Admin sidebar with Collections highlighted under the Tools section.
Step 2: Create a New Collection
On the Collections page, you will see a list of any existing collections in your workspace. To create a new collection, click the + New Collection button in the top-right corner of the page.
The Collections list page showing existing collections and the New Collection button.
You will be taken to the New Collection form. Start by entering a descriptive Collection Name (e.g., “Product Catalog”, “Vendor Directory”, “Parts Inventory”). Optionally, check the box to add this collection to all departments automatically.
Step 3: Define Your Fields
The core of your collection is its schema—the set of fields (columns) that define the structure of each record. In the Items section of the form, click + Item to add fields one by one. For each field, you will configure the following properties:
The New Collection form showing field configuration with Name, Type, Description, and property checkboxes.
Field Properties Reference
Property | Description |
|---|---|
Name | A unique name for the field/column in your collection. |
Type | The data type of the field (Text, Keyword, Integer, Float, Date, or Boolean). |
Description | An optional description explaining the purpose of the field. This helps AI agents understand the data context when querying. |
Optional | When checked, records can be saved without providing a value for this field. |
Use For Retrieval QA | Enables this field for keyword-based search and retrieval queries. Recommended for fields users will commonly search or filter on. |
Use For Semantic Search | Enables vector-based (semantic) search on this field, allowing AI-powered natural language queries that understand meaning rather than just keywords. |
Primary Key | Marks this field as part of the collection's composite primary key, used to uniquely identify records. Multiple fields can be combined to form a composite key. |
Multi Value? | Allows the field to hold multiple values per record (e.g., a product with multiple category tags or alternative codes). |
💡 Tip: Write clear, descriptive field descriptions. AI agents use these descriptions to understand the purpose of each field when generating queries, so a good description like “The name of the product or part” significantly improves query accuracy.
Step 4: Choose the Right Field Types
Selecting the correct field type ensures accurate storage, efficient search, and proper sorting. UpBrains AI supports the following field types:
Field Type | Description & Use Case | |
|---|---|---|
Text | Free-form text fields such as product names, descriptions, or notes. Supports full-text and semantic search. | |
Keyword | Exact-match identifiers such as part numbers, SKUs, status codes, or categories. Ideal for filtering and aggregation. | |
Integer | Whole number values such as quantities, counts, or ranking scores. | |
Float | Decimal number values such as unit prices, weights, or percentages. | |
Date | Date and datetime values for tracking timestamps, expiration dates, or schedule entries. | |
Boolean | True/false flags such as active status, availability, or approval indicators. | |
💡 Best Practice: Use Keyword for identifiers and codes that require exact matching (e.g., SKU-12345). Use Text for longer, natural-language fields where full-text or semantic search is beneficial (e.g., product descriptions).
Step 5: Save and Seed Your Collection
Once you have defined all of your fields, click the Save button in the top-right corner to create the collection. Your new collection will now appear in the Collections list.
Populate Collections via CSV Content
To populate your collection with initial data, click the three-dot menu (⋮) next to your collection in the list and select Upload CSV file. The CSV file should have column headers that match the field names you defined in the collection schema. UpBrains will automatically map the CSV columns to the corresponding fields and import the data.
💡 Note: Ensure your CSV headers match the field names in your collection exactly. Mismatched headers will result in unmapped data. The upload supports standard CSV format with comma-separated values and UTF-8 encoding.
Viewing and Managing Collection Data
Once your collection is created (and optionally seeded with CSV data), you can browse, search, and manage its records directly from the Operations Workspace.
Switch to the Operations Workspace
From the Workspace dropdown at the top of the left sidebar, select Operations. This is the day-to-day workspace where your team interacts with collections, conversations, cases, and other operational data.
Open Your Collection
In the left sidebar, click on Collections. You will see a dropdown listing all available collections in your workspace. Select the collection you want to work with (e.g., “Product Catalog”). The main panel will display the records stored in that collection in a tabular format.
Search, Filter, and Manage Records
From the collection view, you have full control over your data:
Search: Use the search bar at the top to find specific records by typing a query and pressing Enter.
Filter: Click the Filters button to apply field-based filters and narrow down the displayed records.
Create new items: Click the + Create Item button in the top-right corner to manually add a new record to the collection.
Edit an item: Click the three-dot menu (⋮) in the Action column next to any record and select Edit to modify its values.
Delete an item: Click the three-dot menu (⋮) and select Delete to remove a record from the collection.
The Operations Workspace displaying a Product Catalog collection with search, filters, pagination, and per-record Edit/Delete actions.
💡 Tip: The Operations Workspace is designed for everyday users and operators. Collection schema configuration is done in the Admin Workspace, while day-to-day data browsing and management happens here in Operations.
Using Collections with AI Agents
Once created and populated, Data Collections become a powerful tool for your AI agents. Agents can interact with collections in several ways:
Query data: Agents can search and retrieve records using keyword-based queries, structured filters, or natural language semantic search powered by the AI Query layer.
Insert records: Agents can add new records to the collection as part of an automated workflow (e.g., creating a new product entry when processing an incoming catalog).
Update and delete records: Agents can modify existing records or remove outdated entries to keep the collection current.
Sync with external systems: Collections can be periodically synchronized with external data sources including databases, ERPs (e.g., SAP, NetSuite), accounting systems (e.g., QuickBooks, Sage), and other enterprise platforms to keep data up to date.
Setting Up Data Synchronization
UpBrains AI supports automated data synchronization between your collections and external data sources. This enables your collections to stay up to date with the latest information from your systems of record.
Supported Sync Sources
Databases: SQL and NoSQL databases accessible via standard connection protocols.
ERP systems: SAP, Oracle, NetSuite, Microsoft Dynamics, and other enterprise resource planning platforms.
Accounting systems: QuickBooks, Sage, Xero, and similar financial platforms.
Online spreadsheets: Google Sheets and Microsoft Excel 365, enabling teams to maintain data in familiar spreadsheet tools while keeping the collection in sync.
Other external systems: — CRMs, inventory management tools, logistics platforms, and any system accessible via API.
How to Configure a Sync
To set up automated data synchronization for a collection, you need to create a dedicated Automation Agent with a schedule trigger. This agent will run on a recurring basis (e.g., every hour, daily, or weekly) and pull the latest data from your external source into the collection, or push updated records from the collection out to external systems.
To create a sync agent, navigate to Agents > Automation Agents in the left sidebar and follow the standard agent creation workflow. Select a schedule-based trigger and configure the data source connection and field mapping.
➡ For detailed instructions on creating AI Agents, see: Creating your First AI Agent
➡ For connecting to external tools and data sources, see: Connecting External Tools & Data
💡 Tip: For spreadsheet-based syncs with Google Sheets or Microsoft Excel 365, use the built-in Google Sheets or Microsoft 365 connectors available under Connections in Admin Settings. This provides a seamless, no-code sync setup.
Summary
Data Collections give your UpBrains AI workspace a flexible, AI-ready data layer powered by OpenSearch. With support for structured schemas, multiple field types, semantic search, CSV imports, and automated syncing with external systems, collections serve as the central data backbone for your AI-driven automation workflows. Once configured, your agents can query, insert, update, and manage collection data autonomously, keeping your operations running smoothly with minimal manual intervention.
Related Documentation
Memory Store