🎯 Guide to Connecting Zendesk with UpBrains AI
With Zendesk Integration with UpBrains AI, you can streamline actions such as attachment and ticket classification, information extraction from both attachments and tickets, and many other automations.
The following guide helps you setup your account on UpBrains AI workspace.
🔵 Step 1: Create a Connection
After login, in Admin Workspace, find Settings in the left menu, and click on Connections.
When the Connections page opens, Click on New Connection, and fill out the form:
Field | Example | Description |
|---|---|---|
Name | zendesk | Choose a unique name for your connection |
Subdomain | Your company’s subdomain | Your Zendesk subdomain (e.g., acme from acme.zendesk.com) |
⚠️ Note: If the connection name is already used by you, you will receive an error, choose a different one.
Once you click on Connect, a window opens so that you login with an account with Admin role to your Zendesk account. Once logged in, you should see it successfully connecting (screenshot below). Hit save to save the new connection.

The following steps assumes you have created a connection and will take you through a few steps to use your connection to test you are connected and receive ticket information from Zendesk in the test and production modes.
🔵 Step 2: Create an Agent and Configure its Trigger
You can create an agent from scratch or get started by choosing one of Zendesk Agent Templates to continue this guide. Look for agent templates that have a Zendesk icon on them, meaning they are triggered by Zendesk.
Assuming you have created an agent draft, click on the agent to open Agent Builder. When setting up your Agent:
Under Trigger Type, choose Zendesk.
Then choose the desired event:
✅ New Ticket – triggers the agent when a new ticket is posted created.

UpBrains AI’s Zendesk integration supports three types of triggers:
Trigger | Description |
|---|---|
New Ticket or New Public Comment | Fires when either a new ticket is created or a public comment is added |
New Ticket | Fires only when a new ticket is created |
New Public Comment | Fires when a public reply is added to a ticket |
🔵 Step 3: Configure Advanced Trigger Options
Once connected, you can fine-tune the trigger behavior with these options:
Option | Description |
|---|---|
Groups (required) | Select which groups this trigger applies to. You can choose Any or those tickets that are not assigned to a group at the trigger time by selecting ‘-’. |
Shared (optional) | Correlate all runs triggered by the same Zendesk ticket |
No Data Retention (optional) | Enable this to avoid storing agent run/session data |
Only trigger if ticket has attachments (optional) | Zendesk trigger will only trigger if attachments are included in the ticket |
🔵 Step 4: Test the Trigger
To verify that the trigger works as expected:
Click Test Trigger to receive real ticket data from Zendesk.
Create a ticket in your Zendesk account that meets the conditions of the trigger

After you press Test Trigger and create a ticket that meets the condition, within a minute, you should see the payload from Zendesk in the Trigger Test area in the right-bottom corner of the screen. This is a JSON object with ticket information. You should be able to use this information in the rest of Agent flow design and process the.
🔵 Step 5: Design Your Agent Flow
Once successfully tested the trigger, you should design your flow. You may start from one of existing Agent Flow Templates or see the Guide on How to Create your First AI Agent for creating custom agent flows.
Processing Ticket Attachments
The best practice for processing attachments of an email is use a Loop element to process all attachments of an email:

🔵 Step 6: Going Live
When you are ready and tested every step of your flow, Publish your agent flow. This will create the necessary trigger and webhook entries in Zendesk for this particular Agent so that it can receive the ticket information that meet the trigger conditions.
To test your live settings, now create an event (ticket or comment) that meets the trigger conditions. To ensure this works correctly, you should check 2 areas:
In Zendesk
Go to Admin Center -> Webhooks. Find the webhook that has UpBrains AI in its name along with the id of your agent flow in UpBrains AI (e.g., ‘UpBrains AI Workflow Webhook. XBXcjOmKUqdN8EW9gf…’). Then, click on it to see the details. Click on Activity. You should see the payload and the timestamp of fired events.
In UpBrains AI
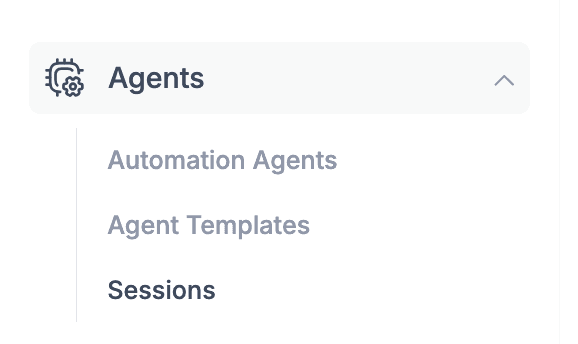
Workspace: In Admin Workspace under Agents click on Sessions. You should see a list of the latest agent runs (based on your Zendesk triggers) and their status. If you click on any of the agent run records, you should be able to see the execution details of your agent automation flow and the status of each step. If they are processed successfully, you are done! Congratulations!
🔐 Notes on Security
UpBrains AI’s Zendesk connection has the option to set it up to use Access Token when receiving communications from Zendesk. We recommend using this option for enhanced security.
Token is sent via Header authorization.
If your user token is refreshed or is invalid (changed from the auto-set value)triggers will silently fail—ensure token refresh as needed.
🗂 Example Use Cases
✅ OCR ticket attachments and enter the text as a comment into the ticket
✅ Extract information from ticket data or attachments
✅ Automate invoice, purchase order, quote and other processes involving tickets
✅ Classify and find high priority tickets based on ticket data and attachment information
✅ Summary
With Zendesk + UpBrains AI, you can:
Extract and analyze ticket content
Automatically respond to public comments
Process ticket attachments and automate processes
Send alerts or notifications
Save attachments to cloud storage
Process invoice, purchase order, quotes and other documents
Build AI agents that process and group your tickets based on your business transactions
🧩 Need help?
Reach out via the Contact Us form in UpBrains AI or Book a Demo for tailored onboarding.
🎯 Guide to Connecting Zendesk with UpBrains AI
With Zendesk Integration with UpBrains AI, you can streamline actions such as attachment and ticket classification, information extraction from both attachments and tickets, and many other automations.
The following guide helps you setup your account on UpBrains AI workspace.
🔵 Step 1: Create a Connection
After login, in Admin Workspace, find Settings in the left menu, and click on Connections.
When the Connections page opens, Click on New Connection, and fill out the form:
Field | Example | Description |
|---|---|---|
Name | zendesk | Choose a unique name for your connection |
Subdomain | Your company’s subdomain | Your Zendesk subdomain (e.g., acme from acme.zendesk.com) |
⚠️ Note: If the connection name is already used by you, you will receive an error, choose a different one.
Once you click on Connect, a window opens so that you login with an account with Admin role to your Zendesk account. Once logged in, you should see it successfully connecting (screenshot below). Hit save to save the new connection.
The following steps assumes you have created a connection and will take you through a few steps to use your connection to test you are connected and receive ticket information from Zendesk in the test and production modes.
🔵 Step 2: Create an Agent and Configure its Trigger
You can create an agent from scratch or get started by choosing one of Zendesk Agent Templates to continue this guide. Look for agent templates that have a Zendesk icon on them, meaning they are triggered by Zendesk.
Assuming you have created an agent draft, click on the agent to open Agent Builder. When setting up your Agent:
Under Trigger Type, choose Zendesk.
Then choose the desired event:
✅ New Ticket – triggers the agent when a new ticket is posted created.
UpBrains AI’s Zendesk integration supports three types of triggers:
Trigger | Description |
|---|---|
New Ticket or New Public Comment | Fires when either a new ticket is created or a public comment is added |
New Ticket | Fires only when a new ticket is created |
New Public Comment | Fires when a public reply is added to a ticket |
🔵 Step 3: Configure Advanced Trigger Options
Once connected, you can fine-tune the trigger behavior with these options:
Option | Description |
|---|---|
Groups (required) | Select which groups this trigger applies to. You can choose Any or those tickets that are not assigned to a group at the trigger time by selecting ‘-’. |
Shared (optional) | Correlate all runs triggered by the same Zendesk ticket |
No Data Retention (optional) | Enable this to avoid storing agent run/session data |
Only trigger if ticket has attachments (optional) | Zendesk trigger will only trigger if attachments are included in the ticket |
🔵 Step 4: Test the Trigger
To verify that the trigger works as expected:
Click Test Trigger to receive real ticket data from Zendesk.
Create a ticket in your Zendesk account that meets the conditions of the trigger
After you press Test Trigger and create a ticket that meets the condition, within a minute, you should see the payload from Zendesk in the Trigger Test area in the right-bottom corner of the screen. This is a JSON object with ticket information. You should be able to use this information in the rest of Agent flow design and process the.
🔵 Step 5: Design Your Agent Flow
Once successfully tested the trigger, you should design your flow. You may start from one of existing Agent Flow Templates or see the Guide on How to Create your First AI Agent for creating custom agent flows.
Processing Ticket Attachments
The best practice for processing attachments of an email is use a Loop element to process all attachments of an email:
🔵 Step 6: Going Live
When you are ready and tested every step of your flow, Publish your agent flow. This will create the necessary trigger and webhook entries in Zendesk for this particular Agent so that it can receive the ticket information that meet the trigger conditions.
To test your live settings, now create an event (ticket or comment) that meets the trigger conditions. To ensure this works correctly, you should check 2 areas:
In Zendesk
Go to Admin Center -> Webhooks. Find the webhook that has UpBrains AI in its name along with the id of your agent flow in UpBrains AI (e.g., ‘UpBrains AI Workflow Webhook. XBXcjOmKUqdN8EW9gf…’). Then, click on it to see the details. Click on Activity. You should see the payload and the timestamp of fired events.
In UpBrains AI
Workspace: In Admin Workspace under Agents click on Sessions. You should see a list of the latest agent runs (based on your Zendesk triggers) and their status. If you click on any of the agent run records, you should be able to see the execution details of your agent automation flow and the status of each step. If they are processed successfully, you are done! Congratulations!
🔐 Notes on Security
UpBrains AI’s Zendesk connection has the option to set it up to use Access Token when receiving communications from Zendesk. We recommend using this option for enhanced security.
Token is sent via Header authorization.
If your user token is refreshed or is invalid (changed from the auto-set value)triggers will silently fail—ensure token refresh as needed.
🗂 Example Use Cases
✅ OCR ticket attachments and enter the text as a comment into the ticket
✅ Extract information from ticket data or attachments
✅ Automate invoice, purchase order, quote and other processes involving tickets
✅ Classify and find high priority tickets based on ticket data and attachment information
✅ Summary
With Zendesk + UpBrains AI, you can:
Extract and analyze ticket content
Automatically respond to public comments
Process ticket attachments and automate processes
Send alerts or notifications
Save attachments to cloud storage
Process invoice, purchase order, quotes and other documents
Build AI agents that process and group your tickets based on your business transactions
🧩 Need help?
Reach out via the Contact Us form in UpBrains AI or Book a Demo for tailored onboarding.
Connecting to Microsoft Outlook