Onboarding —Ticket and Message Classification
This step asks you whether you want the incoming messages or new tickets to be classified or not. The incoming messages may have content such as request for quote, new order, cancellations, order changes, returns and more. Such a classification help you triage your incoming messages for more effective management.
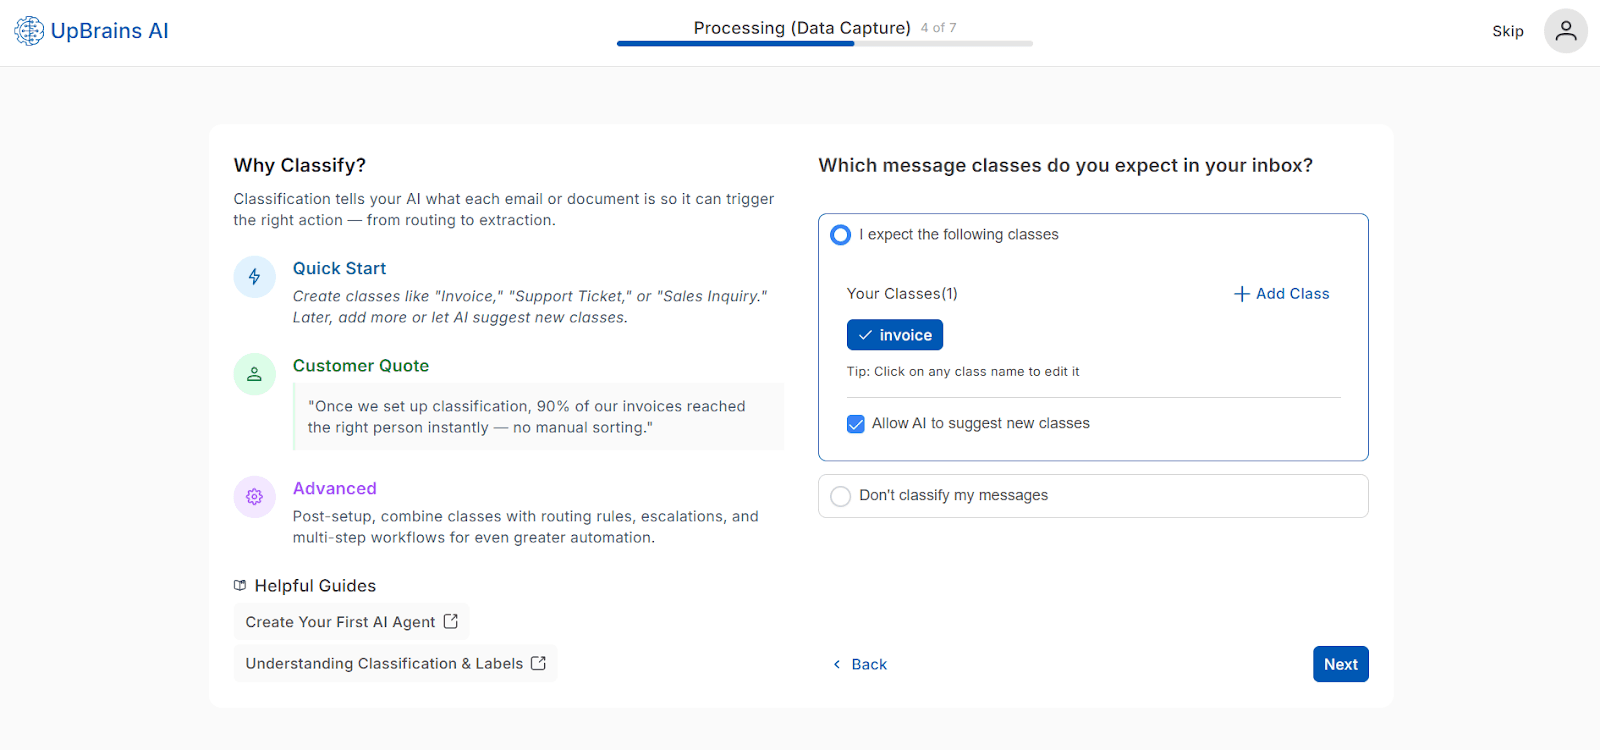
Here you can start with preconfigured classes, if any, or use "Add Class" action to create your own. You may also opt-in to allow AI to suggest classes for your incoming messages, or opt-out of message classification altogether.
Link: Add Class — Opens a modal window where you can name and describe your class.
Option: Allow AI to suggest new classes — AI will automatically detect and propose new categories based on email/document content.
Option: Don’t classify my messages — You may choose to skip the email/ticket classification.
Here is the screenshot of the modal that opens after clicking on "Add Class" link:
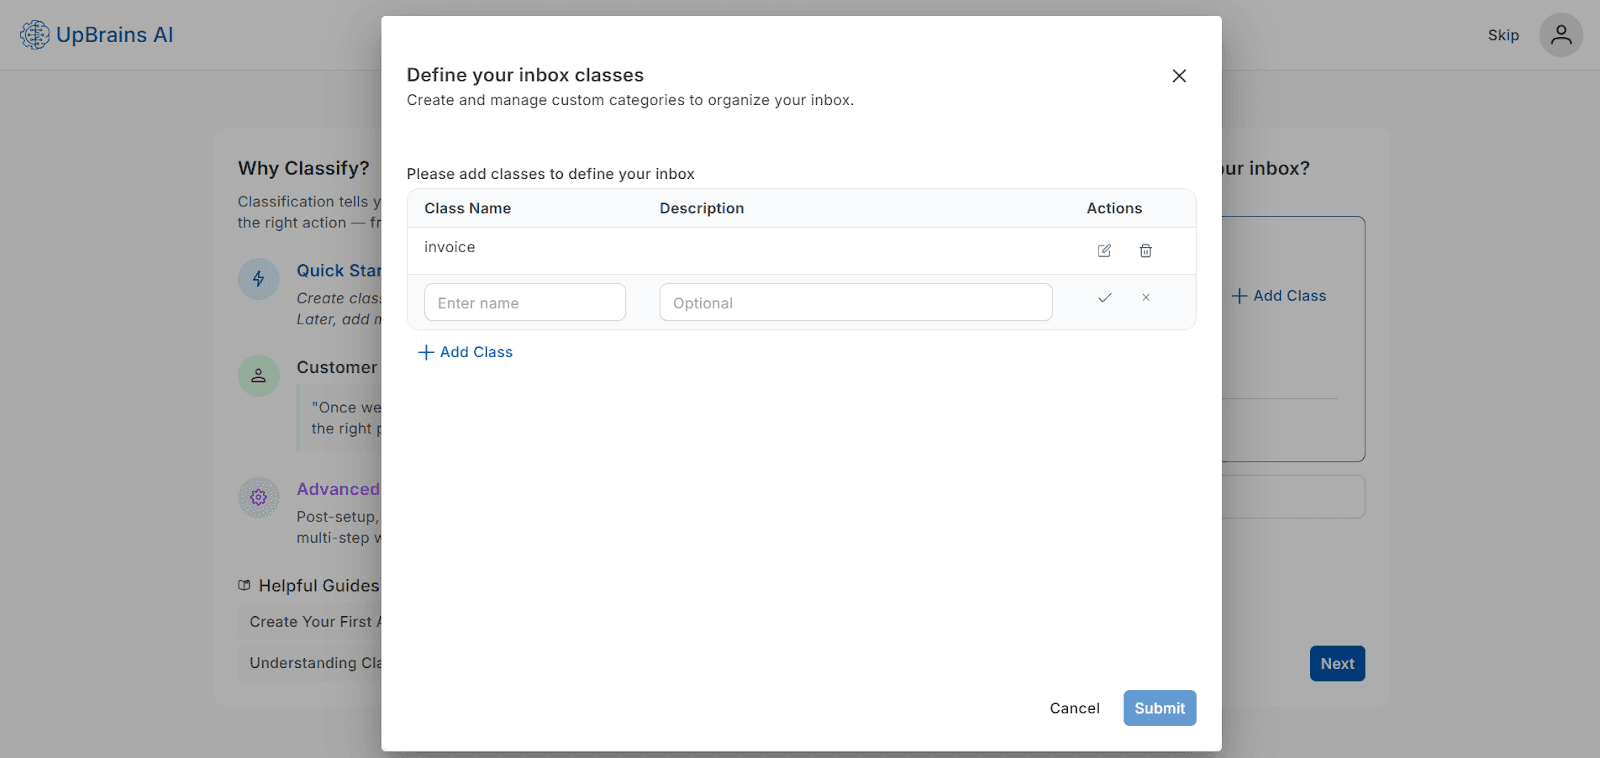
You can add new classes, or click on the respective buttons on any class name to edit or delete it after creation.
Pro Tip
Start simple — create only a few key classes that reflect your daily operations. As AI learns from your data, it will refine classification accuracy and recommend additional categories.
Helpful Guides
Onboarding —Ticket and Message Classification
This step asks you whether you want the incoming messages or new tickets to be classified or not. The incoming messages may have content such as request for quote, new order, cancellations, order changes, returns and more. Such a classification help you triage your incoming messages for more effective management.
Here you can start with preconfigured classes, if any, or use "Add Class" action to create your own. You may also opt-in to allow AI to suggest classes for your incoming messages, or opt-out of message classification altogether.
Link: Add Class — Opens a modal window where you can name and describe your class.
Option: Allow AI to suggest new classes — AI will automatically detect and propose new categories based on email/document content.
Option: Don’t classify my messages — You may choose to skip the email/ticket classification.
Here is the screenshot of the modal that opens after clicking on "Add Class" link:
You can add new classes, or click on the respective buttons on any class name to edit or delete it after creation.
Pro Tip
Start simple — create only a few key classes that reflect your daily operations. As AI learns from your data, it will refine classification accuracy and recommend additional categories.
Helpful Guides
Document Information Extraction