Onboarding — Connect your inbox
During the steps below you will be guided to connect your inbox so that AI agent can read and process your messages.
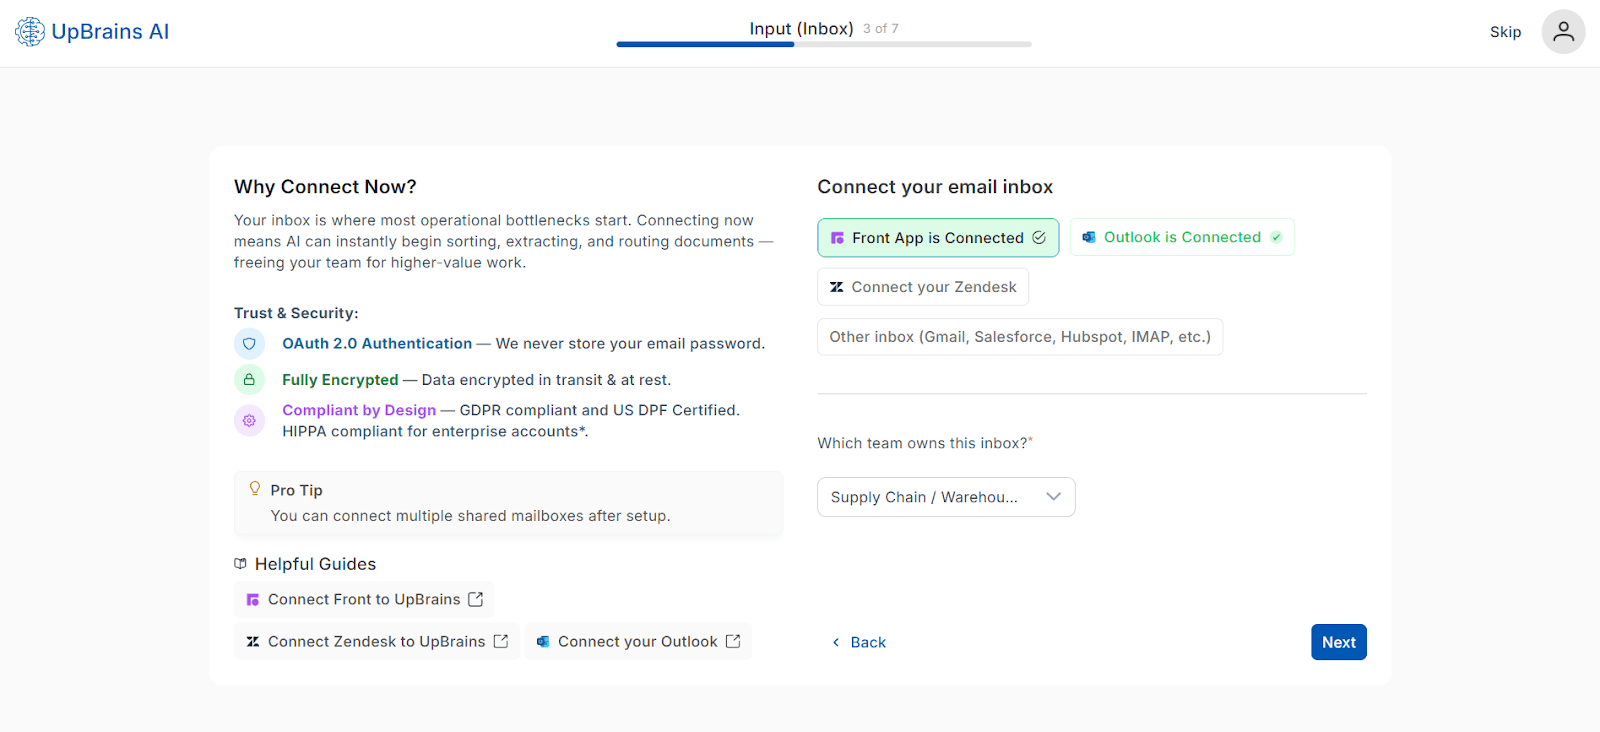
1 — Choose Your Inbox Source
Select one or more inbox sources:
Front App
Outlook
Zendesk
Other inboxes (Gmail, Salesforce, HubSpot, IMAP, etc.)
Each connection grants secure OAuth access. No credentials are stored locally or shared.
📘 Additional Helpful Guides:
2 — Which team owns this inbox?
Determines which extractors, templates, and workflows will be preloaded.
Teams:
Quality / Regulatory
Supply Chain / Warehouse
Finance (AP/AR)
Production / Operations
Operations / Entry
Lab Admin / Reporting
Maintenance / QA
Other
Effect on next steps: Selecting a team preloads the relevant Document Classes and Message Classes.
B) Front App — Authentication Options
Selecting Front App opens this modal:
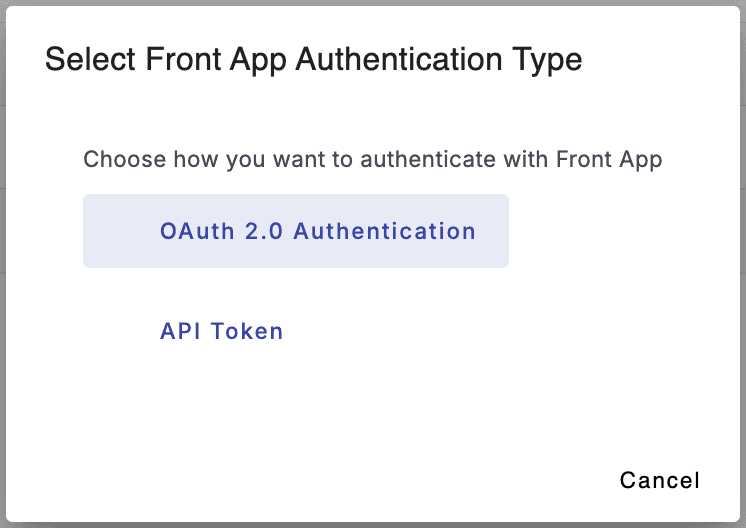
If you choose, OAuth 2.0, then you would need to login to your Front account. Note that a Front Admin account is required for granting the access.
You may decide to provide an API token, instead, to allow access to non-shared resources to AI agents. Please consult with the guide in Connect your Front account for more details.
C) Zendesk — Additional Configuration Required
After Zendesk connection, you need to also specify you would like to process tickets from which Zendesk group:
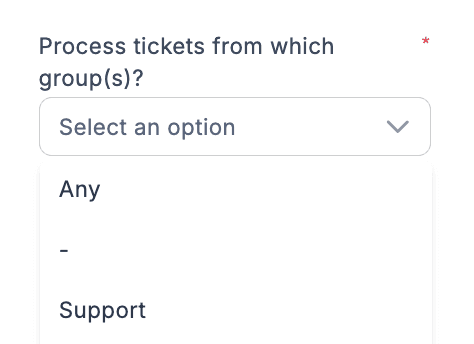
You may also select Any (indicating tickets from all groups) or '-' meaning tickets that do not have a group assigned yet, or choose a specific group from the list.
D) Other Inbox — Custom Agent Route
If Other inbox option is selected, you will be routed to the Custom Agent Creation page, where you can:
Build a new AI agent from scratch with any inbound message channel. In addition to Gmail, Salesforce, Hubspot, IMAP, other supported channels include SMTP, WhatApp, Twillio, Slack, Microsoft Teams and a few other communication tools.
Your may choose to start from a template
Customize your agent's triggers, extractors, and workflow rules
💡 Tip: Prebuilt agent templates come preloaded with extractors, workflow logic, and data mapping rules for common operations
Starting from a template
If you choose "Other inbox (Gmail, Salesforce, Hubspot, IMAP, etc.) you will be guided to a template selection page, where you can start from a predefined template or you have the option to start from an empty agent builder editor to design your own agent:
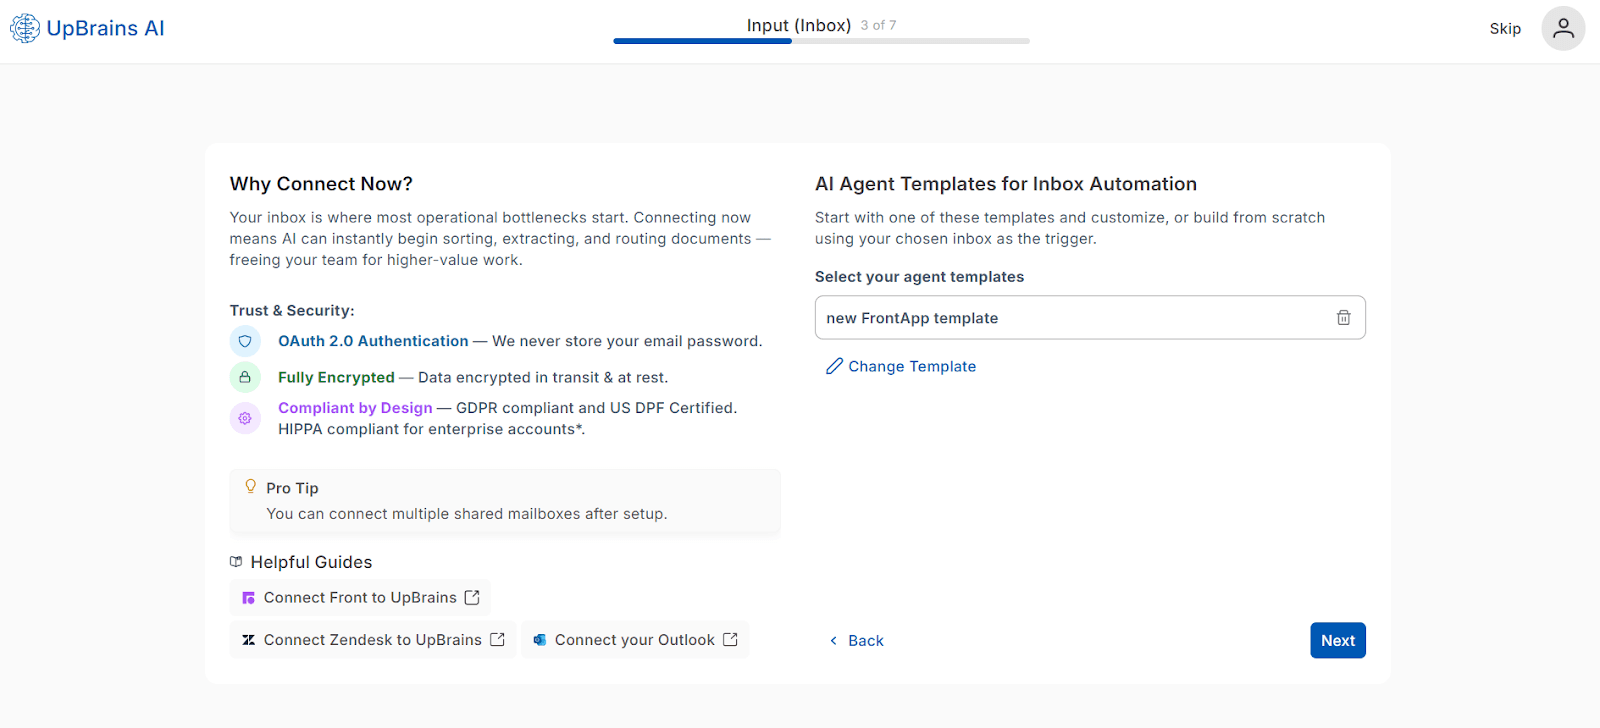
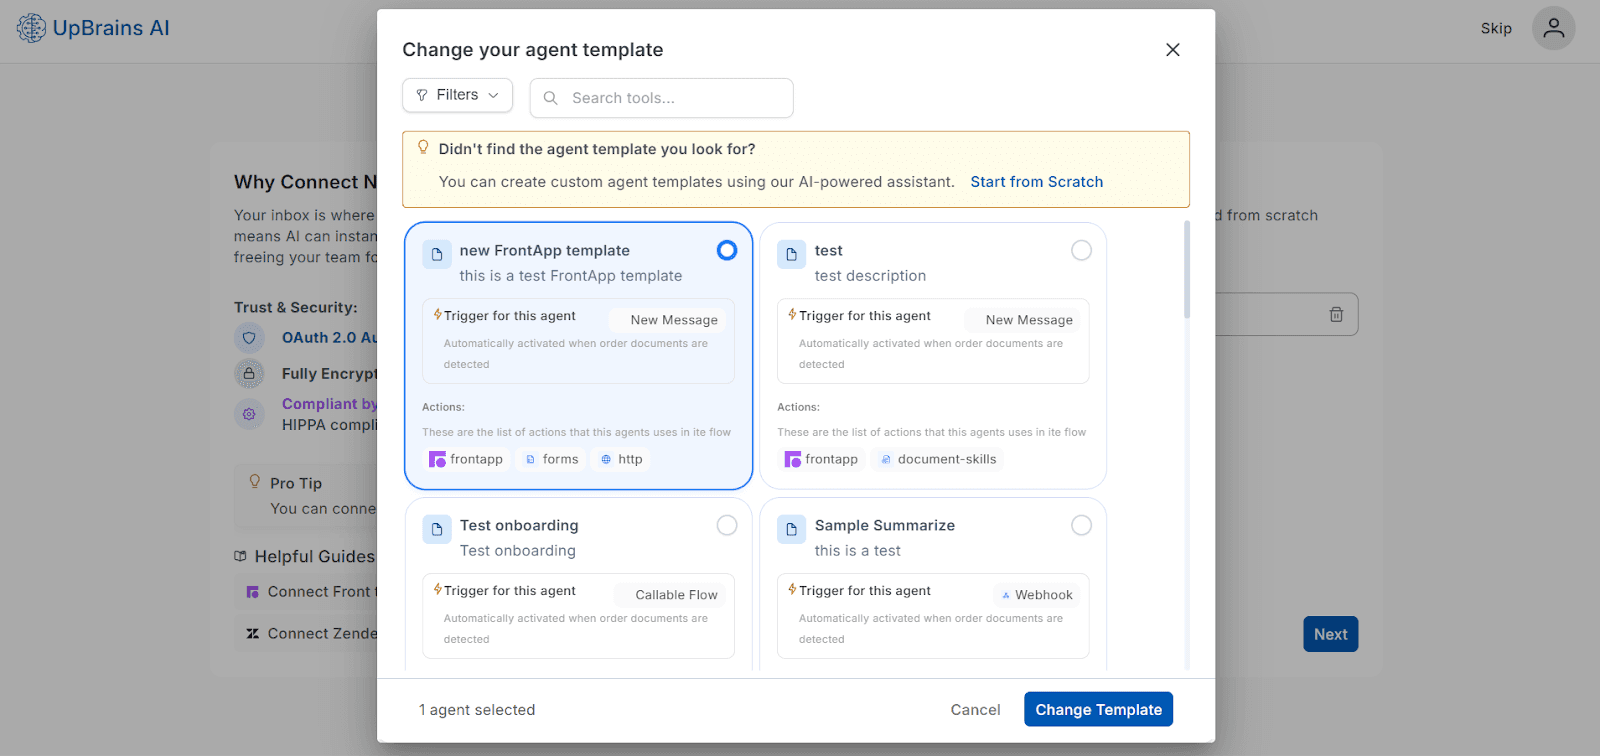
When you click on "Change Template" a modal will open that will show the list of prebuilt templates as well as the option to start from scratch.
After selecting a template, you will be back to the template selection page where if you click on Next you will be guided to Agent Builder with a preconfigured agent template that you can customize and publish.
Onboarding — Connect your inbox
During the steps below you will be guided to connect your inbox so that AI agent can read and process your messages.
1 — Choose Your Inbox Source
Select one or more inbox sources:
Front App
Outlook
Zendesk
Other inboxes (Gmail, Salesforce, HubSpot, IMAP, etc.)
Each connection grants secure OAuth access. No credentials are stored locally or shared.
📘 Additional Helpful Guides:
2 — Which team owns this inbox?
Determines which extractors, templates, and workflows will be preloaded.
Teams:
Quality / Regulatory
Supply Chain / Warehouse
Finance (AP/AR)
Production / Operations
Operations / Entry
Lab Admin / Reporting
Maintenance / QA
Other
Effect on next steps: Selecting a team preloads the relevant Document Classes and Message Classes.
B) Front App — Authentication Options
Selecting Front App opens this modal:
If you choose, OAuth 2.0, then you would need to login to your Front account. Note that a Front Admin account is required for granting the access.
You may decide to provide an API token, instead, to allow access to non-shared resources to AI agents. Please consult with the guide in Connect your Front account for more details.
C) Zendesk — Additional Configuration Required
After Zendesk connection, you need to also specify you would like to process tickets from which Zendesk group:
You may also select Any (indicating tickets from all groups) or '-' meaning tickets that do not have a group assigned yet, or choose a specific group from the list.
D) Other Inbox — Custom Agent Route
If Other inbox option is selected, you will be routed to the Custom Agent Creation page, where you can:
Build a new AI agent from scratch with any inbound message channel. In addition to Gmail, Salesforce, Hubspot, IMAP, other supported channels include SMTP, WhatApp, Twillio, Slack, Microsoft Teams and a few other communication tools.
Your may choose to start from a template
Customize your agent's triggers, extractors, and workflow rules
💡 Tip: Prebuilt agent templates come preloaded with extractors, workflow logic, and data mapping rules for common operations
Starting from a template
If you choose "Other inbox (Gmail, Salesforce, Hubspot, IMAP, etc.) you will be guided to a template selection page, where you can start from a predefined template or you have the option to start from an empty agent builder editor to design your own agent:
When you click on "Change Template" a modal will open that will show the list of prebuilt templates as well as the option to start from scratch.
After selecting a template, you will be back to the template selection page where if you click on Next you will be guided to Agent Builder with a preconfigured agent template that you can customize and publish.
Message/Ticket Classification